Friday, August 31, 2012

Pin-Up Girls Series ~ Glamourious

Welcome back!  For this card, I used cuts from the Cricut cartridge French Manor.  I added some black seam binding, antique buttons and some froufrou ribbon.  I also added a cut to the inside of the card to complete the theme.

Antique buttons from my stash.

Froufrou ribbon by WesbstersPages.


Glamourious: She puts the "high" in maintenance.

Thursday, August 30, 2012

Pin-Up Girls Series ~ Sassy

Ready for my third installment of the Pin-Up Girls Series? 


This card was mostly inspired by the crafty bleedingcricutgreen.  She was in a hat pin swap I recently participated in and created the most beautiful pin holders (the fan and rose).  I took these elements and upcycled them to create this card.  I changed out the paper of the fan, relocated the rose, and straightened her lace ribbon bow to create my border.  I then added a lace seam binding bow, the pin and flashcard and added it all to matching cardstock layers.  I didn't add any additional greeting to the inside since I had already added one to the front.

Wednesday, August 29, 2012

Pin-Up Girls Series ~ Vixen

Here is the second card in my vintage pin-up girl series.  I used the Cricut Cartridge Girl's Makeup Party to cut the mirror and French Manor to cut the sofa. 


All the pattern paper I am using in this series is from a paper pad by Crafty Secrets titled Classic Paper Designs. The solid cardstock is mostly Stampin' Up! with a few other brands here and there. 

I used black seam binding for my first ribbon layer topped with a small bow made from WebstersPages ribbon.  I also embossed the mirror with a cuttlebug folder.

The inside reads Vixen: She is irresistible to men.
Hope to see you tomorrow for the next installment in the series.

Monday, August 27, 2012

A New Series: Pin-Up Girls

I decided to start a new series featuring pin-up girls.  It is going to be very eclectic and maybe not what your are expecting.  I hope you enjoy it!  My inspiration started with a small note card set I received as a gift.  Once I knew I was using the note cards, I purchased some pins with vintage pin-up images as well.  I then gathered up a bunch of different supplies that I thought would work well with these two items:


For the first card in the series I used the telephone cut from the cartridge Summer in Paris to match the pin-up girl in the pin:


I also used a feather flower, clear gen stones and hand dyed seam binding ribbon to complete my embellishments.


And the note card I picked to match:  Goddess  - She is larger then life.

Tuesday, August 21, 2012

Gift Card Holder

Here's a gift card holder I created using Cricut Girl's Makeup Party for the box and Imagine Cartridge Word of Mouth for the images:

It's a little hard to see, but the words are all pop dotted up.

I left the bottom portion blank to write in my message.

It's sized perfectly to add in a gift card(s).
Here is my Craft Room file for easy reproduction:
https://www.box.com/s/ba1b99e9f4dc0cadda25

Enjoy!

Saturday, August 11, 2012

Hat Pin Swaps

I was recently in three hat pin swaps hosted by JJewel (who was a wonderful hostess by the way).  We were challenged to create two hat pins per swap and a container/tag to hold them.  Here is what I came up with:

The tag was created using the Imagine cartridges Blossom and Imagine More.  The fabric flower was handmade by me.  I also embossed the green layer with a damask embossing folder and added a Stampin' Up! half pearl in the center of the flower.  The white ribbon is seam binding.

My hat pins are supposed to be be fairies, but they can pass as angels as well.

I used a tag from the Cricut cartridge Art Philosophy for this tag.  I ensured I used double sided paper (McKenna by K& Company) since both sides would be seen.  I adhered the bottom and sides of the fold over flap with tape, but left the top open so that I could slide in a tea bag to match the theme of my hat pins.  Again, I created a handmade flower and added a matching cats eye half bead to the center of the flower.  Additional embellishments included websterpages lace ribbon and ivory tulle.

A close up of the tea pots.


To create the holder for this swap, I used a favor box from the Cricut cartridge Girl's Makeup Party and images from the Imagine cartridge Yummy.  I added a window to the favor box and covered it using upcycled cartridge clam shells.  Lastly, I added stickles for a cherry and Stampin' Up! ribbon for a small bow.  The cardstock I used for the boxes was wausau brand  in shell.

And here are my yummy ice cream cone pins.

The was such a fun swap to participate in.  I had such a great time brainstorming what I was going to do for my themes and had even a better time playing with beads.  I can't wait to participate in another hat pin swap!  If you haven't been in any swaps, I encourage you to.  They really help to get your creative juices flowing, to dabble in something new, and to meet online friends.  It's a very fulfilling experience!  =)

Friday, August 3, 2012

Movable Monsters: Mummy

So I decided to challenge myself and try another one of the Movable Monsters from the Cricut Craft Room carts.  Let me tell you, they are quite tricky without any direction or pics to go from!  Once I started playing with this new monster, I decided that some of the cuts have multiple layers to hide the joints (not what I did with the skeleton).  I am not sure that I am assembling these right.  I am using my best judgement and what "looks" right to me.  ;)


This monster is postured sideways.  Since he is sideways, I added one leg to the front and one to the back.

I decided that if he was sideways, you would not be able to see both legs fully.   I changed the positioning of the legs so that the legs were on top of each other.  Later, I changed the legs once more and moved the hanging piece leg to the back and movde the other leg to the front..

This is how I assembled my joints.  I first  added the bottom layers...

Then used pop dots to add the top layers, fully covering the joints.   Notice how I didn't glue/tape the actual joints in order to keep them mobile.
Another view of how I added the top layers to cover the joints.


 I also pop dotted the layers that didn't cover the joints for dimension as well as inking the edges in Ranger Iced Spruce distress ink.


For texture and a slight aging effect, I added Ranger distress crackle paint in Clear Rock Candy to some of the pieces.

So this is my take on the mummy.  It will be interesting to see how far off I am when Provo Craft actually adds a visual and some directions.  I hope my creations are too laughable!  =)

Thursday, August 2, 2012

WHOO-HOO!!! 31 Days to Use CCR for Free!

WHOO-HOO!!!  Did you know that if you are a renewing Cricut Circle Member (new yearly membership began yesterday) you get FULL access to ALL the exclusive digital cartridges in the Cricut Craft Room for the month of August? 


And, you can download them to your Gypsy once you sync it up!  That's right!  ALL of them!  How cool is that???  Now, this deal only applies to Circle members that were current prior to yesterday's beginning sign up date.  You also get to CHOOSE your cart out of about 5 of them when signing up for the Cricut Circle.

Some of the digital images in CCR are ones I have not heard of or seen before until yesterday.  There is a series called Movable Monsters. 


There are also a witch and zombies image.  Unfortunately, there aren't ANY directions yet, but here is my take on the skeleton:

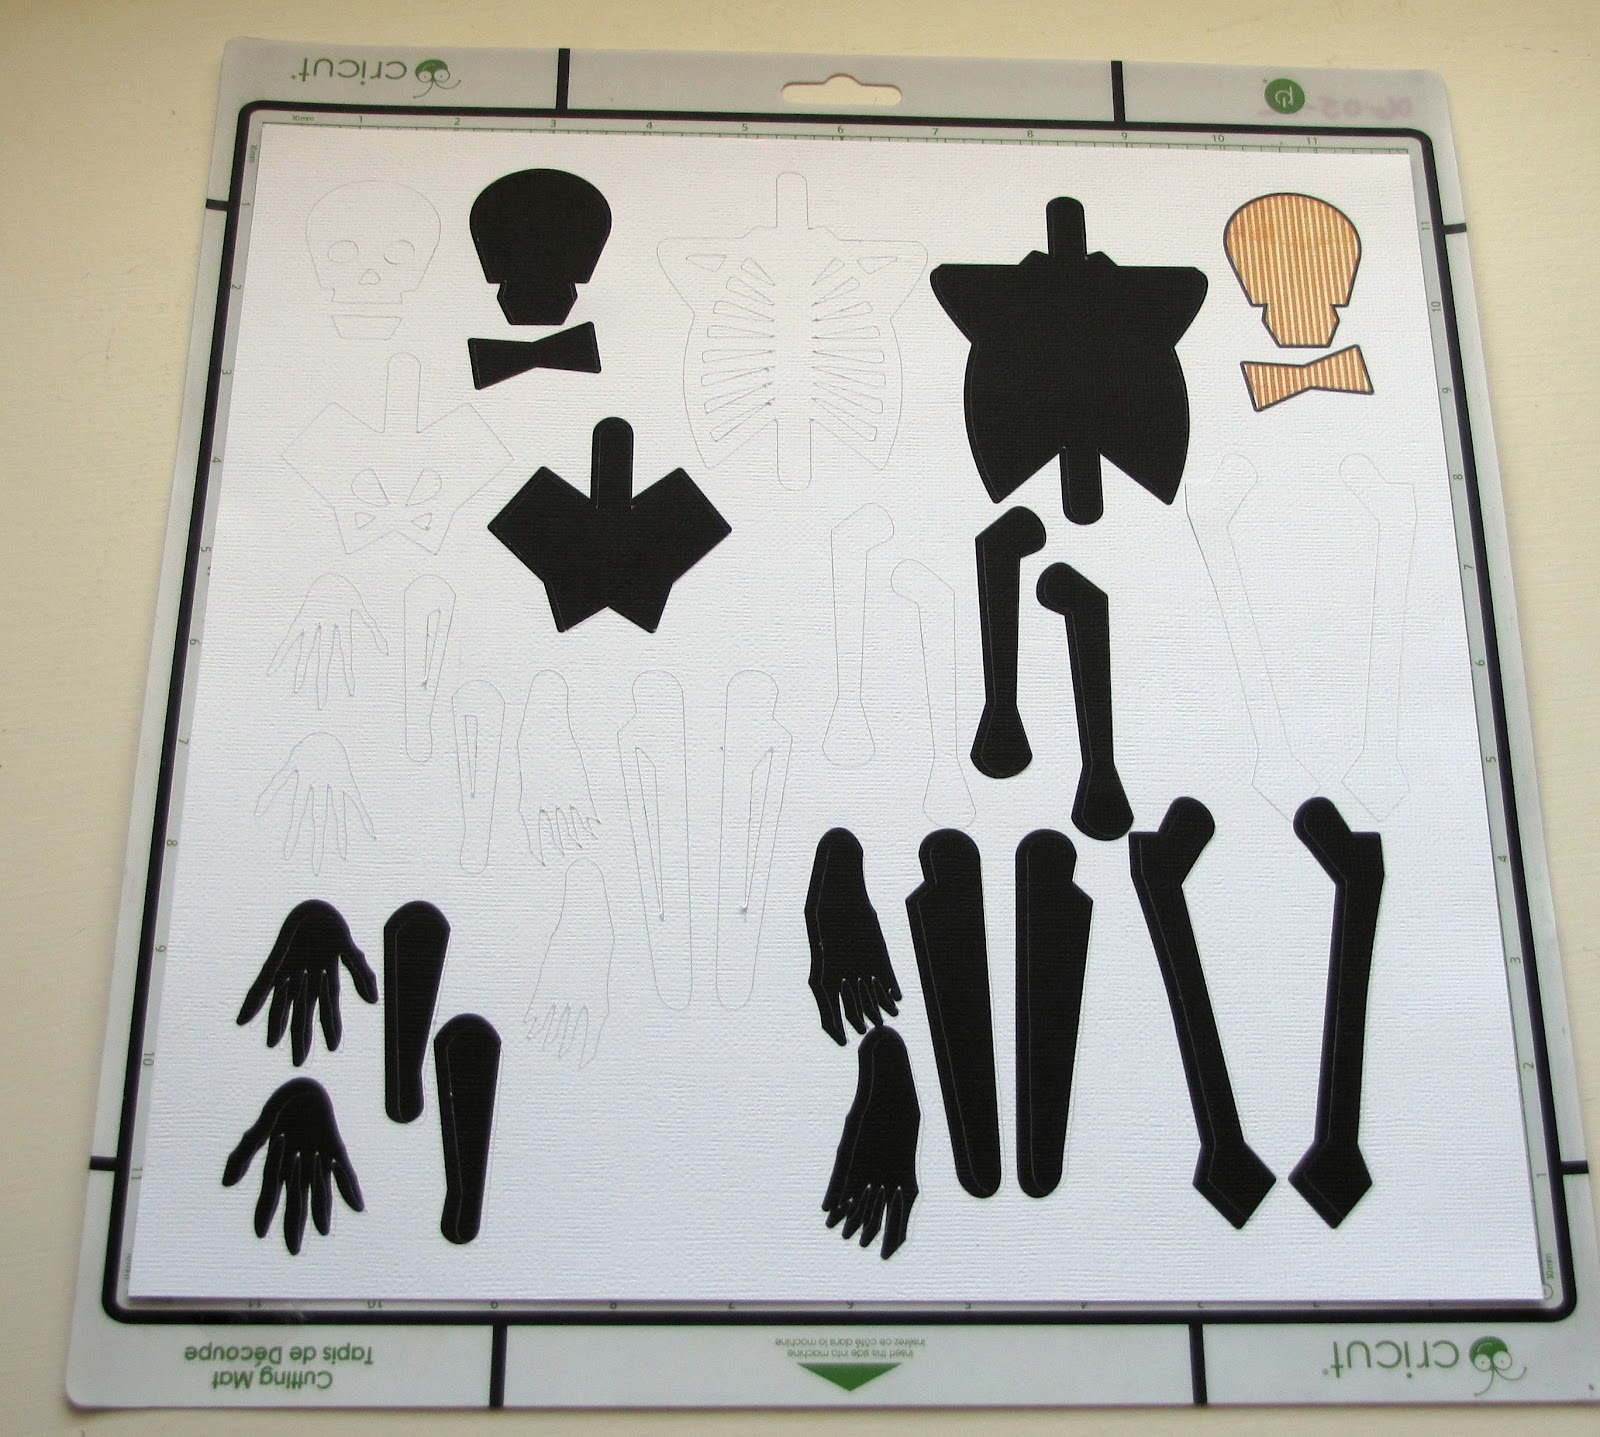
I first added all the cuts to the mat and colored in the base layers black and the tie an orange striped pattern from Buccaneer.  The skull's first layer is 1.94" and all the other cuts are relative to this size.

Here is a better view.

I then glued my layers together and added holes centered on the edge of each cut.  I used small brads I purchased at the Target $1 spot some time ago to combine the joints.

When adding the pieces together, I added them on top of the base piece (the body) and then on top of each other.  Not sure if this is right, but I liked the way it looked better then adding below the base piece.  I also didn't want the brad to show on the mouth, so I added it's layer AFTER I combined the two pieces together. 

When adding the mouth layer, I used glue dots so it would give it some dimension to look a little 3-D.  I also added some distress ink to the finished skeleton for a little more dimension. 

From this pic, you can see how I added a brad to the tie as well.  I played with the idea of pop dotting it on, but thought it would be more whimsical with a brad.  I don't think that it's supposed to move, but hey, it's my take on the skeleton, right?  I also added a third layer on the on the back of the head using pop dots (don't adhere at the joint) so you could see what it would look like if you covered up the backs so you couldn't see the brads.  If you did this to the entire skeleton it would certainly make it more sturdy if that's what you needed.


So what are you waiting for?  Renew your membership and start playing with all the free carts!  See you on the boards!

EDIT:  OK.  I had a duh moment.  I put the femur on the bottom of the leg instead of the tibia/fibula.  Thanks for letting me know Missie!  =)  Here is the updated skeleton:

He's sexy and you know it (wiggle, wiggle, wiggle, wiggle, wiggle)!  I still am not sure if the smaller bones should go the outside... What do you think?  Thanks goodness the bones are connected with brads.  Easy to fix!  =)