- Cricut cartridge Elegant Edges and CCR Exclusive - Cricut Craft Room Basics
- Cuttlebug Anna Griffin Matalasse embossing folder and border
- Stampin' Up! Daffodil Delight Cardstock
- Stampin' Up! Razzleberry Lemonade designer paper
- Prima Say it in Crystals
Showing posts with label Cricut - Elegant Edges. Show all posts
Saturday, May 11, 2013
Circleville NSD Sketch Challenge "Oh the Places You'll Go"
Here is a card I made for the NSD Challenge "Oh the Places You'll Go."
Materials Used:
Saturday, October 6, 2012
Falling for Halloween Blog Hop
Welcome to the Falling for Halloween Blog Hop. Thanks for joining us to enjoy all the wonderful crafty inspiration for the fall and Halloween season.
You should have arrived here from Beth's blog. If you missed the beginning of the hop, please go to Maria's blog to start so you don't miss any of the fantastic fall projects we have to share with you.
For my project, I made a trio of cards:
Materials Used:
You should have arrived here from Beth's blog. If you missed the beginning of the hop, please go to Maria's blog to start so you don't miss any of the fantastic fall projects we have to share with you.
For my project, I made a trio of cards:
Materials Used:
- Cricut cartridge Elegant Edges
- Imagine cartridge The Good Old Days
- Reminisce Hallowe'en Greetings paper
- Misc patterned cardstock
- Black cardstock
- Black seam binding
- Webster's Pages red ribbon
- Misc hat pins
- American Crafts white twine
- Misc antique buttons
- Martha Stewart course glitter
- Black stitching
- October Afternoon Witch Hazel Miscellany wording
| The hat pins I used were traded during the last swap I was in. All the hat pins used on these cards were made by the talented Caffinee. |
| I added stitching for added interest and texture. |
| The phrase "Beware!" is from October Afternoon's Witch Hazel Miscellany kit. |
| The glitter used is Martha Stewart's course glitter. |
| The witch on this card is printed from the Imagine cartridge The Good Old Days. |
This is the sheet of paper that inspired my creations:
| The sheet is by reminisce and is called Hallowe'en Greetings. I can still make quite a few more cards just from this one sheet of paper! |
Here is my Cricut Craft Room File for easy recreation: https://www.box.com/s/tlttd8dwmszp6qufw1tv
Thank you so much for joing us today! As a thank you for visiting my blog today, I am giving away the Cricut Lite Cartridge Dude!:
All you have to do to win is leave a comment on this post. I will be picking a winner, using Random.org, next Tuesday, October 9, 2012 and post to my blog. The lucky winner will have until Friday, October 12 to contact me with their mailing information.
The next blog you will be visiting belongs to the very talented and fun Debbie. Happy Crafting!!!
And here is the entire Blog Hop list in case you get lost:
Paulette http://scrapalette.blogspot.com/
Renee icameisawicreated.blogspot.com You are HERE
Angela @ Angie's Paper Passion
Sara @ sarawandrews.com
Michele @ www.michelegreen.com
Thursday, April 12, 2012
I heart U
Our latest magazine challenge on the Cricut Circle blog is to create a project with our new Circle exclusive cartridge, Letter Envy. I hope to create a few more projects with it (by end of day this thursday evening) because we can enter as many times as we want this time! I am SO far behind, though. Many peeps have already entered 10 times! WOW!
Materials Used:
You can still enter this week's challenge here.
Materials Used:
- Cricut cartridges Letter Envy, Art Philosophy and Elegant Edges
- Stampin' Up! cardstock in Basic Gray, Melon Mambo, Old Olive and Naturals White
- Stampin' Up! 1/2" polka dot grosgrain ribbon in Melon Mambo
- Imaginisce i.rock gems
You can still enter this week's challenge here.
Thursday, January 5, 2012
Weekly Challenge #48: Creative Resolutions for 2012 Challenge!
The Challenge: Whenever the New Year rolls around, we tend to do a little self-evaluation and decide what we want to do differently in the year to come. For the challenge this week, we want you to think about your CREATIVE resolutions and record them in some way. Do you want to stretch your creativity in new ways? Maybe you want to try a new hobby or learn something new. Maybe you want to simplify. Whatever it is, get those goals down on paper!
For this challenge, I created a calendar/goal minder. One side has the calendar that I can interchange and the flip side has my creative goals for 2012. Some of them are quite lofty, but what's the harm in dreaming big? ;)
| My creative goals for 2012. I need to go back and add the year...oops! |
| Stampin' Up "Full Calendar" stamp set used. |
| Frame bought from Ikea. |
Wednesday, November 30, 2011
Thanksgiving 2011 2 Page Layout
WOW! Was that ever a lot of food!!! I had a fantastic Thanksgiving holiday with my family. I hope you did too! I am on the ball, and have already created the scrapbook pages for this year's photos. Now...to just get them developed! ;)
Carts Used: Autumn Celebrations, Elegant Edges, Gypsy Font
Gypsy File:
Tuesday, November 22, 2011
My Pink Stamper November 2011 Assignment ~ Unique Folds
Hi everyone! For November's My Pink Stamper assignment, we were challenged to use a unique card folding technique. I chose to create a Center Step Card in an A2 size (some call it Center Kick):
Materials Used:
Materials Used:
- Cricut cartridges, Martha Stewart Holiday Cakes, Elegant Edges and Going Places
- My Pink Stamper "Flowers & Friendship" stamp set
- Stampin' Up cardstock in Marina Mist, Wild Wasabi, Real Red & Crumb Cake
- Stampin' Up dsp in Wild Wasabi
- Stampin' Up Bright Bolds brads
- Stampin' Up classic ink in Marina Mist, Early Espresso & Real Red
- Ranger distress ink in Forest Moss
- Red Stickles
- Pop Dots
| Step 1 Start with a 5 1/2" x 8 1/2" piece of cardstock. |
Step 4Score between cut lines at 4.25". The card should now look like this. |
Step 5Fold at the score lines. The first, third and center score lines are mountain folds. The second score line is a valley fold. Use a bone folder to increase the crispness of your folds/scores. |
Step 6Once opened, the card should look like this. Now, just decorated as desired! |
Tuesday, September 20, 2011
Spooky ~ My Pink Stamper Monthly DT Post, September 2011
This month for our My Pink Stamper Design Team Day, we were assigned to create with Robyn's new Spook-alicious Stamp Set. I decided to go back to my first love and create a layout.
Materials Used:
Thank you for viewing this month's My Pink Stamper design team post. You can purchase the Spook-alicious stamp set HERE.
Materials Used:
- Cricut cartridge Elegant Edges: Page 49~ Book
@ fit to page - Cricut cartridge Mini Monsters: Page 42 ~ Spooky, Layer 1, Layer 2 x2, Layer 2
, Base Shadow all @ 4.0"; Page 74 ~ SpdrWeb2 @ 5.5" - My Pink Stamper Spook-alicious stamp set
- Core'dinations core essentials card stock
- Cloud 9 Design Seasonal paper pad
- DCWV Midnight Spell stack
- Black stickles
- Stampin' Up black journaling marker
- Stampin' Up Whisper White craft ink
- Stampin' Up scallop punch
- Chipboard letters from stash
- Black fiber from stash
- Clear embossing powder
Thank you for viewing this month's My Pink Stamper design team post. You can purchase the Spook-alicious stamp set HERE.
Saturday, August 27, 2011
Cricut Circle Sisters Fall Blog Hop
Welcome to the Fall Blog Hop with Circle Sisters!
You should be coming from the talented Mary's blog. Wasn't that a neat box? If you've just happened to come across my blog or are visiting, please come and join in on the fun! The fall blog hop starts at Kristen's blog and has so many great projects for you to enjoy.
What's the first thing you think of when you think of fall? OK, I didn't make anything with a turkey... What's the second thing you think of? Pumpkins of course!
This 3D pumpkin in a crate is created utilizing the Cricut project cart, Sweet Tooth Boxes. Yes, it is actually the ice cream cut!
Materials used:
I then adhered the vines and leaves to the pumpkin using a glue gun (but other adhesives would work). I attached the stem by bending the bottom portion and slipping it under the top slit of the pumpkin. I then added the stem, raffia around the crate base, stamped my sentiment in Old Olive onto my double layer tag and then added the tag to the pumpkin using the twine. I plan on filling the treat box with the harvest blend of candy corn (the one with pumpkins, gourds and multi-colored corn) that my daughter and hubby love so much for a fun fall treat.
I am including my Gypsy file for easier re-creation:
http://www.box.net/shared/hfnki618cusznoy9elvo
As a thank you for visiting my blog, I am offering some blog candy to get you "warmed up" for fall:
Thank you again for visiting! I hope to see you again! Your next stop on the blog hop is Carolyn. Enjoy.
1) Kristen http://fantabulouslypink.blogspot.com/
2) Michele www.michelegreen.com
3) Roberta http://www.txscrappermom.blogspot.com/
4) Mary http://www.marebearscraps.blogspot.com/
5) Renee http://icameisawicreated.blogspot.com/ <--- You are visiting me!
6) Carolyn http://cccscraproom.blogspot.com/ Go here NEXT
7) Gamma http://gammascreativecorner.blogspot.com/
8) Colleen http://www.scrappycol.blogspot.com
9) DoodleDiva www.doodledivadesigns.com
10) Kimbe http://kimberliscreations.blogspot.com/
11) Lisa http://addictedtothecricut.blogspot.com
12) Gonecampn http://www.scrapcavecreations.com/
13) Momto2cuties http://www.inlovewithpaper.blogspot.com/
14) Scrapalette http://scrapalette.blogspot.com/
15) Paper Memories http://papermemories4u.blogspot.com/
16)Darcy http://dlmbscrapping-time2create.blogspot.com/
17)Lavendergal http://ibecircled.blogspot.com
19) HappyScrapper64 http://happyscrapper64.blogspot.com/
20) Madylyn http://inspiredbycolor.blogspot.com/
21)Nancy http://lanancyworkshop.blogspot.com/
22)Debbie http://bugginattheseams.blogspot.com/
23)Tracy http://www.scrappininthewoods.blogspot.com/
24)Sharon http://designsbysharon.blogspot.com/
*** This will also be my Cricut Circle Weekly Challenge #39: A-B-C, 1-2-3 entry:
The Challenge: This week our challenge is inspired by all the kiddos heading back to school. It is a recipe challenge of sorts based on ABC, 123. Please include (A) Pop of (B)right (C)olor on your page, as well as 1 of something, 2 of something, and 3 of something. For example, Suzanne’s page below has a POP of bright red on her page. Then she has chosen to use ONE cartridge, TWO ruler stickers, and THREE elements of the red patterned paper . . . but yours could be whatever you would like. One button, two photos, and three patterned papers . . . you decide. It’s really easier than you think! Have fun with it! We can’t wait to see what you come up with!
My A-B-C is orange, my 1 is one stamp used, my 2 is two different colors of ink used, and my 3 is three different cartridges used.
I am also entering it at:

You should be coming from the talented Mary's blog. Wasn't that a neat box? If you've just happened to come across my blog or are visiting, please come and join in on the fun! The fall blog hop starts at Kristen's blog and has so many great projects for you to enjoy.
What's the first thing you think of when you think of fall? OK, I didn't make anything with a turkey... What's the second thing you think of? Pumpkins of course!
This 3D pumpkin in a crate is created utilizing the Cricut project cart, Sweet Tooth Boxes. Yes, it is actually the ice cream cut!
Materials used:
- Sweet Tooth Boxes ~ pg. 15: ConeLy1, ConeLy2, ConeLy3 all cut @ 9.5"
- Cricut Thanksgiving seasonal cart ~ leaf with vine and layer @ 1.5" and again at 1.75", pumpkin stem @ 4.53" x2
- Elegant Edges ~ pg. 70: Desgn2 shadow-s @ 2.06 and 2.29
- Core'dinations & Stampin' Up card stock
- Stampin' Up twine
- Stampin' Up Old Olive Ink
- Ranger Forest Moss distress ink
- Misc. raffia in fall colors
I then adhered the vines and leaves to the pumpkin using a glue gun (but other adhesives would work). I attached the stem by bending the bottom portion and slipping it under the top slit of the pumpkin. I then added the stem, raffia around the crate base, stamped my sentiment in Old Olive onto my double layer tag and then added the tag to the pumpkin using the twine. I plan on filling the treat box with the harvest blend of candy corn (the one with pumpkins, gourds and multi-colored corn) that my daughter and hubby love so much for a fun fall treat.
I am including my Gypsy file for easier re-creation:
http://www.box.net/shared/hfnki618cusznoy9elvo
As a thank you for visiting my blog, I am offering some blog candy to get you "warmed up" for fall:
- Fall raffia sampling
- Package of fall scrapbook titles
- One sheet of adhesive tags
- "Falling in Love" lacing mini kit by Cosmo Cricket
Thank you again for visiting! I hope to see you again! Your next stop on the blog hop is Carolyn. Enjoy.
1) Kristen http://fantabulouslypink.blogspot.com/
2) Michele www.michelegreen.com
3) Roberta http://www.txscrappermom.blogspot.com/
4) Mary http://www.marebearscraps.blogspot.com/
5) Renee http://icameisawicreated.blogspot.com/ <--- You are visiting me!
6) Carolyn http://cccscraproom.blogspot.com/ Go here NEXT
7) Gamma http://gammascreativecorner.blogspot.com/
8) Colleen http://www.scrappycol.blogspot.com
9) DoodleDiva www.doodledivadesigns.com
10) Kimbe http://kimberliscreations.blogspot.com/
11) Lisa http://addictedtothecricut.blogspot.com
12) Gonecampn http://www.scrapcavecreations.com/
13) Momto2cuties http://www.inlovewithpaper.blogspot.com/
14) Scrapalette http://scrapalette.blogspot.com/
15) Paper Memories http://papermemories4u.blogspot.com/
16)Darcy http://dlmbscrapping-time2create.blogspot.com/
17)Lavendergal http://ibecircled.blogspot.com
19) HappyScrapper64 http://happyscrapper64.blogspot.com/
20) Madylyn http://inspiredbycolor.blogspot.com/
21)Nancy http://lanancyworkshop.blogspot.com/
22)Debbie http://bugginattheseams.blogspot.com/
23)Tracy http://www.scrappininthewoods.blogspot.com/
24)Sharon http://designsbysharon.blogspot.com/
*** This will also be my Cricut Circle Weekly Challenge #39: A-B-C, 1-2-3 entry:
The Challenge: This week our challenge is inspired by all the kiddos heading back to school. It is a recipe challenge of sorts based on ABC, 123. Please include (A) Pop of (B)right (C)olor on your page, as well as 1 of something, 2 of something, and 3 of something. For example, Suzanne’s page below has a POP of bright red on her page. Then she has chosen to use ONE cartridge, TWO ruler stickers, and THREE elements of the red patterned paper . . . but yours could be whatever you would like. One button, two photos, and three patterned papers . . . you decide. It’s really easier than you think! Have fun with it! We can’t wait to see what you come up with!
My A-B-C is orange, my 1 is one stamp used, my 2 is two different colors of ink used, and my 3 is three different cartridges used.
I am also entering it at:
Friday, July 15, 2011
Cricut Circle June Magazine Challenge 2011
JUNE MAGAZINE CHALLENGE!
TERESA COLLINS SPONSOR CONTEST!
Teresa Collins is one of our favorites in our little Circle! We have featured her paper collections and Imagine Cartridge all through this month’s issue. It’s only fitting to use her designs in our contest this month! We invite you to create a project, layout, card or gift item using any of her paper collections, Imagine cartridge or Blingage. We would like it to have a celebration theme. Maybe an elegant birthday, anniversary or wedding.
Contest Rules: Use at least 4 Cricut Cuts from any cartridge in your design and at least 3 Teresa Collins products like her paper collections, Imagine cartridge, Blingage, albums or any other product she produces in your design.
TERESA COLLINS SPONSOR CONTEST!
Teresa Collins is one of our favorites in our little Circle! We have featured her paper collections and Imagine Cartridge all through this month’s issue. It’s only fitting to use her designs in our contest this month! We invite you to create a project, layout, card or gift item using any of her paper collections, Imagine cartridge or Blingage. We would like it to have a celebration theme. Maybe an elegant birthday, anniversary or wedding.
Contest Rules: Use at least 4 Cricut Cuts from any cartridge in your design and at least 3 Teresa Collins products like her paper collections, Imagine cartridge, Blingage, albums or any other product she produces in your design.
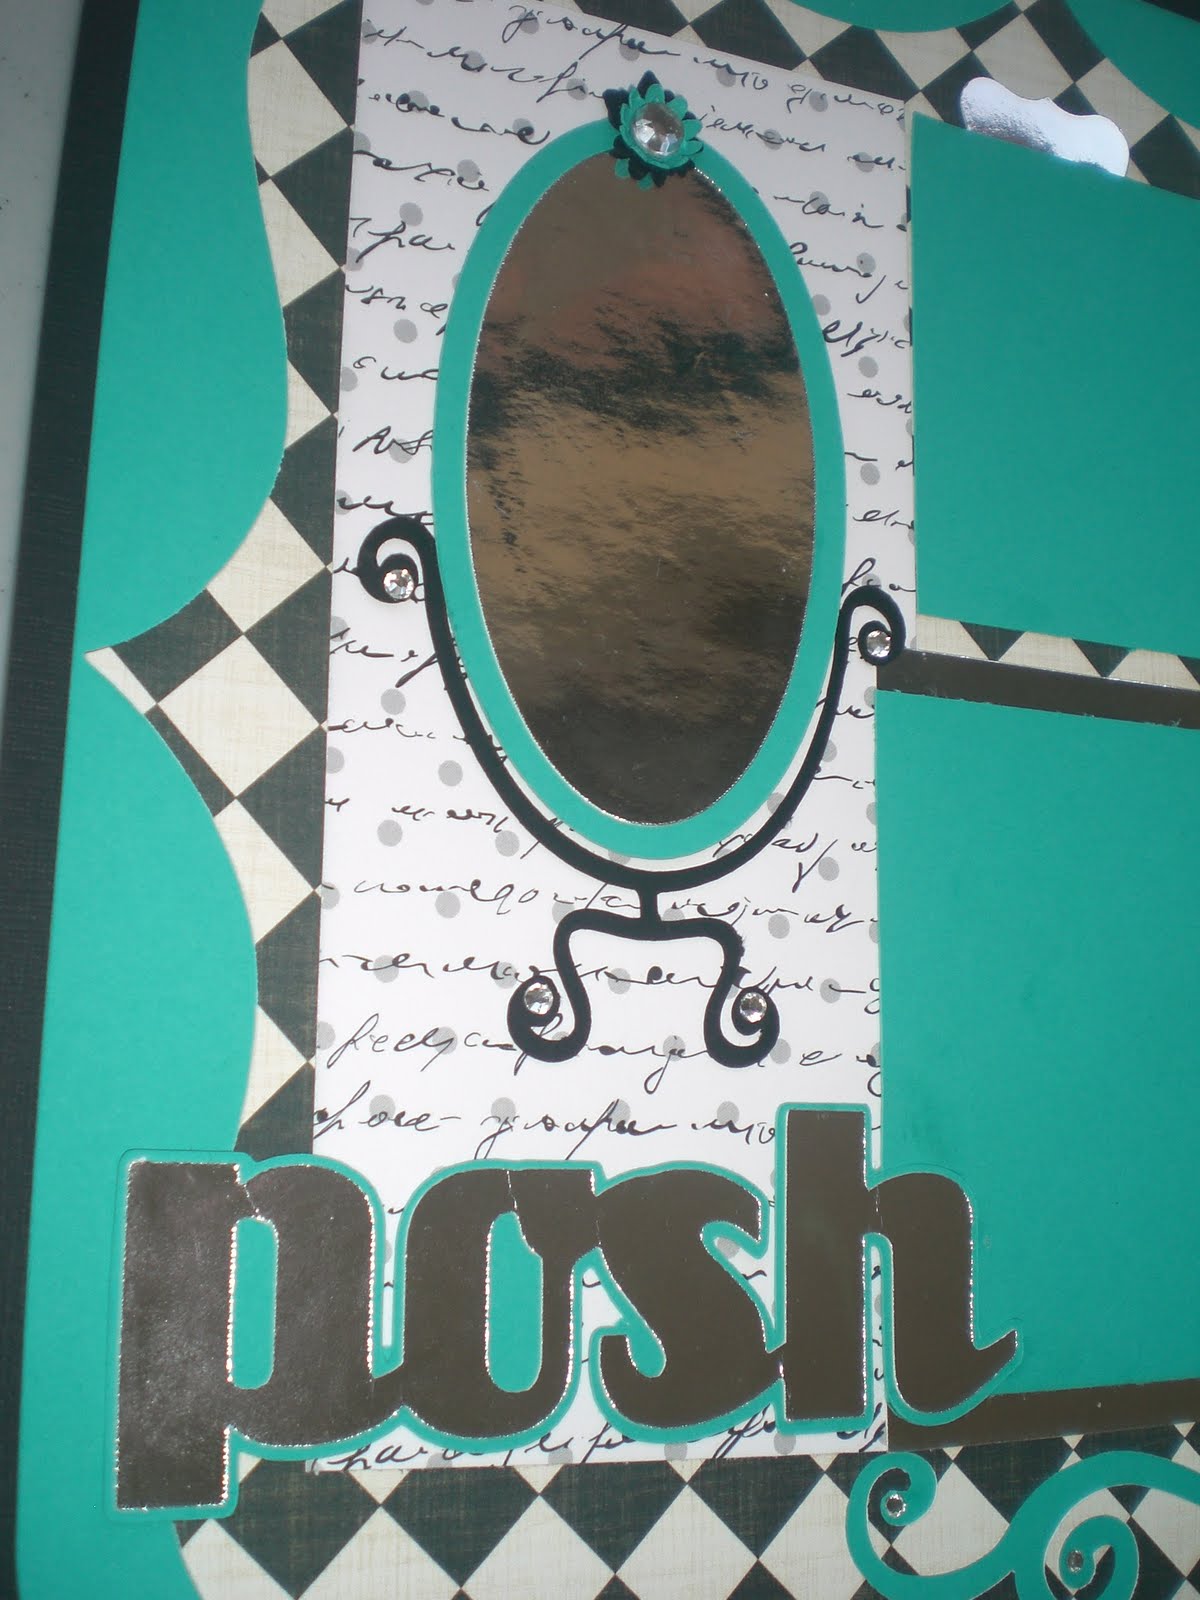
I created this layout using Teresa Collins designer paper, blingage & trims. Teresa's products remind me of everything feminine, so I just had to create a feminine page. The carts used were Elegant Edges and Mini Monograms for the frames and Forever Young for the dressing mirror and title.
Thursday, June 9, 2011
Cricut Circle Blog Weekly Challenge #33: Sweet Summertime
Weekly Challenge #33: Sweet Summertime Challenge!
The Challenge: What makes summertime “sweet” to you? Ice cream treats? Watermelon? Popsicles? Whatever it is we want you to include the shape of your favorite summertime sweet treat on your project. But that’s not all! Raid your stamp stash and incorporate them somewhere on your project as well. Have fun!
I created this layout featuring a end of the school year swim party my daughter had. Cuts I used include the font from Feeling Groovy, the watermelon from Just Because Cards and the citrus background shape (fit to page) from Elegant Edges. I embellished the edges with a Signo pen and pop dotted each layer of the watermelon and the smaller pic. The phrase is from My Pink Stamper ~ Fruit & Veggie Puns and the tab and brads are SU.
Subscribe to:
Posts (Atom)