Friday, May 13, 2011

May 2011 Cricut Circle Monthly Challenge: Tic Tac Toe

MAY MONTHLY CHALLENGE: Tic Tac Toe Challenge!
Tic Tac Toe . . . Three X’s in a Row! That’s the goal in this challenge. Look at the tic tac toe board below and choose three squares in a row.
I chose to play the board down the middle utilizing a gypsy welded image, a paper created ruffle and a cuttlebug emboss folder.


To create the base of my project, I used an Anna Griffin Decorative Paper Pack that included instructions on how to make a "Pleated Pillow". I folded most of the directions and then tweaked it at the end to complete it as wall art for by baby, Kadence's room.


Supplies Needed to create the base:

  • An assortment of matching or complimenting decorative and/or matching papers (3 of the same decorative, 1 decorative, one mostly solid or solid decorative, 1 striped, one solid cardstock or sheet
  • One matching ribbon/trim (about 3 feet)
  • One 8 1/2 x 8 1/2 chipboard sheet
  • Craft knife, cutting board and ruler
  • Scoring tool
  • Double stick tape

Instructions:

Mark each of the 3 sheet design paper with a pencil every 5/8" and every 3/8" alternating across the page horizontally. Score along each mark vertically with your scoring tool. Like you are making a fan, fold the first score forward and the next score backward creating 1/4" pleats. Fold entire sheet and adhere pleats with double stick tape. Cut the pleated page horizontally into 6, 2" strips. Affix pleated strips to outside edge of the solid sheet of paper/cardstock. Let pleats overlap in the corners of the page. Miter the corners with a craft knife.

Mark the single decorative sheet every 3/8" and every 1" alternating across the page horizontally. Score along each mark with a scoring tool vertically. This time fold the first score forward and then the next score back toward itself, skipping the 1" in between, making a box pleat. Adhere pleats with double stick tape. Cut the decorative sheet into 1" strips. Affix pleated strips, allowing 1" of the first set of pleats to show on the outer edge. Miter the corners.


Cut and cover and 8 1/2" x 8 1/2"" piece of chipboard with the mostly solid decorative sheet. Affix the ribbon to the back of the covered board, allowing 1/8: of the ribbon to show as a border.

Center and mount your selected design and/or photo to covered chipboard square.

From your striped paper, cut 4, 1/4" strips. Affix strips to form a square around the design and/or photo on the chipboard. Mitre each corner.

Mount the chipboard center to the center of the pleated page. This will leave 5/8" of box pleats bordering the center.

Tie the remaing ribbon pieces into soft knots, and trim. Affix to the ribbon-trimmed corners of the chipboard square.


Cricut Circle Members are the best!

I can't explain how neat it is to belong to the Cricut Circle message board! The members are all so nice, respectful, and genuinely caring. Post after post, we share great ideas, enable each other to spend money (ugh), and support each other through the good and the bad. We truly are an online (and sometimes off) family. Not only did I receive countless congratulations and well wishes upon the birth of my daughter, but I also received some very generous and lovely RAKS.

This card was made for and given to me at the Texas Stampede by Linda P. , Tina G. (shutterbuggin), Veira M. (sorry, not sure if I spelt your name right), and Kim D. Isn't it cute?


These are a set of handmade or boutique (I didn't get a chance to ask you) burp cloths given to me by Leslie Hankley. Some are pale yellow and some this gorgeous print (how did you know I love paisley?). They are so soft, pretty, and unique. I love them (and Kadence does too)! =)


And did you see her calling card? Gorgeous! Sewn lace, beads and a multi-layered nest.

And last, but certainly not least, I received ALL of this from LovintheBug!

4 outfits, a clear baby girl stamp set, a chipboard album and paper, a Cuttlebug cutting die, a vellum baby girl quote pack, a Sizzex stencil, a Fiskars corner rounder AND a new in package Twinkle Toes cartridge. I KNOW!


Thank you ladies for thinking of me and my little one. We are grateful for your generosity!

My Craft Space


I know...it's a mess. It's just too hard to keep it clean!


My space is made up of this corner, a walk-in-closet, and most of the time...my husband's pool table. =)


Wednesday, May 11, 2011

chelemom.blogspot.com Blog Candy!

Michele Kovack, an awesome Provo Craft designer, has a great blog candy giveaway. Be sure to visit her blog for a chance to win Enjoy the Seasons Imagine cart or Everyday Pop-up Cards:

http://chelemom.blogspot.com/

Monday, May 9, 2011

National Scrapbook Day Celebration

National Scrapbook Day Celebration

My Pink Stamper is hosting an all day scrapping event to win an Imagine along with 12 other great prizes:

Challenge #11--Make a project and use Pink, Green and Black in it!

My Pink Stamper Challenge #10--Make a layout or card with a pet in it!

Challenge #9--Use Glitz, Glam and Glitter in your project!

Challenge #8--Make a summer themed project!

Challenge #7--Make a Scrapbook Page!

Challenge #5- Any 3-D item OR if that is too much of a challenge then add a 3-D item on your scrapbook page or card!

Challenge #4: Make something with a Mother's Day Theme!

Challenge #3--Make a card, scrapbook page, or 3-D item with a breast cancer theme. You can use a ribbon, make it pink, whatever you'd like.

Challenge #2--Make a card or scrapbook page using Kraft cardstock.

Challenge #1 - Anything Cupcake!!!
Scrapbook Page, Card, Mixed Media, or other! You do not have to make cupcakes!!

You can see the contest guidelines, rules, and entries by visiting her site:

http://www.mypinkstamper.com/

Saturday, May 7, 2011

Cricut Circle Weekly Challenge #31: Gift Card

Weekly Challenge #31: Gift Card Challenge!
The Challenge: With Teacher Appreciation, Graduation, Baby Showers, Weddings, and other special events that are sure to be gracing your calendar over the next few months, we thought it might be fun to have a challenge to see your creative Gift Card and Money Holder ideas. Using your Cricut create a gift card or money holder.


I created a tri-fold card by welding a liner from the Wild Card cartridge and adjusting the sides with the Gypsy. I then flood filled and cut the liner in smaller sizes for the cards lining with the coins from the Imagine cart - Snapshot: Everyday. Lastly, I cut the "Ooooh!" phrase, soldiers and Hamm from the Toy Story cart. Originally, I planned on putting the three aliens cut underneath the "Ooooh!" to match the phrase, but the parts were too tiny to put together and remain sane, so I put the soldiers instead. I then cut an extra shadow of Hamm and glued it to the back of him and cut out the money slot with an exacto knife to make room and a pocket for the money.


By the way, it is so much easier to put in one white sheet of paper and just flood fill the parts of the Disney characters with the Imagine. Just another reason to buy it!

Saturday, April 30, 2011

April 2011 Cricut Circle Monthly Challenge: Reuse, Repurpose, Recycle!

APRIL MONTHLY CHALLENGE: Reuse, Repurpose, Recycle!
In honor of Earth Day (April 22nd) we would like you to recycle, reuse or repurpose 3 items on your project. For example, cut a shape from junk mail found in your trash can. Reuse something found in a junk drawer, or whatever! Use your creativity! Create a layout, card, altered project, etc. The choice is yours!


For this project, I used 4 recycled items:

1. Sprite Can

2. Scraps of cardstock left from project during the Birthday Class at the Stampede

3. IPOD case

4. Old collected buttons


I wanted a case to store all those buttons you collect as extras from clothing that you never actually use. I had an old IPOD case that I thought would be perfect! I dolled it up by cutting a scalloped flower and button from a Sprite can. I then added leaves from the Give a Hoot cartridge to complete it. The case wrap came from the scraps of cardstock from the Stampede, the button phrase welded and cut from Don Juan, and the misc. button cuts from Tags, Bags, Boxes and More.


Scrapbook Titles:


  • Choose to Reduce

  • Green Power

  • Zero Waste

  • For Every Earthy Reason, Don't Waste It

  • Clear Your Conscience - Cultivate Our Creation

  • Get Into the Green Scene

  • Don't Waste It - Respect It
    •Go Green! Go Green!
    •Why Waste a Cool Planet?
    •Wipe Out Waste
    •It's Easy Being Green - Reduce, Reuse, Recycle
    •Keep It Green
    •Keep Your Earth Clean and Green
    •Show Appreciation for Future Generations
    •The Choice is Yours - Save It or Waste It
    •You are the Difference - Reduce, Reuse, Recycle
    •Being Green is Sexy
    •Green with Envy

Thursday, April 28, 2011

Cricut Circle Weekly Challenge #30 ~ Mom & Me

Weekly Challenge #30: Mom & Me Challenge!
The Challenge: Create a scrapbook page about you and your mom, OR you and one of your children.


I created this scrapbook layout primarily from the Imagine cart Lori's Garden. This cart has so many beautiful floral and feminine images. The large scallop is a flood filled shape from the Imagine Shape Library. The alphabet is cut from Wall Decor and More, utilizing the flood fill option on the Imagine to match the prints and colors from Lori's Garden. I used pop dots to add dimension to the rose in the bottom right hand corner. Other then that, the rest of the layers are composite images. I may go back and add a button or two, but other then that, the images can stand on their own. By the way, the little cutie is Kadence at 2 days old.

I think I am going to start listing titles that match the theme of the project I am working on at the end of each post. Stay tuned for additions to the Scrapbook Title categories of my blog. Also, feel free to add your favorite sayings when commenting so that I and others may also enjoy. =)


SCRAPBOOK TITLES: MOTHER


  • Like Mother, Like Daughter

  • Mommy and Me

  • Every Mother is a Working Woman

  • Unconditional Love

  • Always Caring, Always Giving, Always Loved

  • A Mother's Touch

  • Mother's Loving Ways

  • A Mom of All Trades

  • A Mother's Work is Never Done

  • A Mother is a Girl's Best Friend

  • The Best Friend a Daughter Could Ever Have

  • The Queen and Her Princess

  • A Special Lady

  • "Stay" at Home Mom? Ha!

  • The Queen of all Mums

  • Mommy's Day

  • The "Lap" of Luxury

  • My Guidance

  • A Living Legacy

  • I Owe it All to You

  • Head Honcho

  • A Mother's Love

  • Being a Mother Means...

  • Lifelong Friend and Mother

  • Mother Knows Best

Mother-inLaw


  • My Other Mother

  • Mother by Marriage

  • His Mother, My Friend

Wednesday, April 20, 2011

Cricut Circle Weekly Challange #29: Handmade Flower

Weekly Challenge #29: Handmade Flower Challenge!
The Challenge: Handcraft a flower using your Cricut and/or Cuttlebug machine and use it on your project.


I am back...atleast I think so! =) I guess it depends on the babies and whether or not they let me craft OR if I choose to lose additional sleep! Decisions, decisions.....

For this layout, I used the carts Accent Essentials and Ashlyn's Alphabet. I cut the flower at several different sizes and in two differnet colors. I then alternated the colors to make them pop and used silver and vanilla brads in the middle to give them some additional texture.

Friday, April 1, 2011

My Latest Creation ~


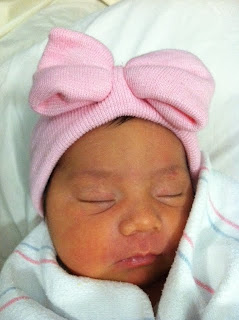
Kadence MaryAnn Cooper was born Tuesday morning. She weighed 6 lbs, 7 oz and was 18.5" in length. She is just a delight! We could not be happier!